Take a peek


 ...Keys

Issue and return keys

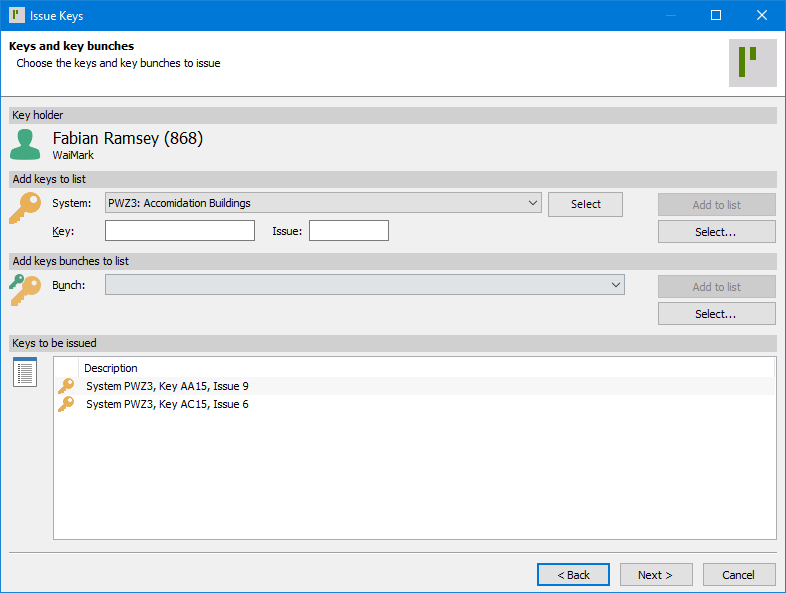
Issue, Return, Re-issue, Return and Issue to a different Keyholder with simple to follow wizards.

ProMaster Key Manager 8 Issue Keys wizard. Displayed is the Key holder (and their employee number) who the keys are being issued to. Beneath that is a section for selecting a key to be issued, with a dropdown list to select a key system along with fields for entering the key and key issue numbers and an ‘Add to list’ button, which is currently disabled. Additionally, there is a ‘Select’ button, to search for keys that have not yet been issued to any Key holder. Below that is a section for selecting a Key bunch to issue to the Key holder, with a dropdown list of available Bunches and a ‘Select’ button to search for key bunches that have not yet been issued to any Key holder. Lastly, a list of keys and key bunches to be issued to the key holder are displayed. In the bottom right corner are buttons “Back”, “Next”, and “Cancel”.
ProMaster Key Manager 8 Key issue responsibility acceptance form. This shows a section of the printed report that is produced when keys are issued (given) to a key holder. Shown is part of the report header, including part of a sample company logo image and the full report title “Key issue responsibility acceptance”. Below that, information about the ‘Key holder’ that the keys are being given to is displayed, including their name, employee number, key holder “Category”, “Company”, phone number and “Address”. Next, text is populated from the key holder’s “Category”, detailing the responsibilities that the key holder is agreeing to when receiving the keys followed by a ‘signature’ box containing the key holders name and place to write the date.

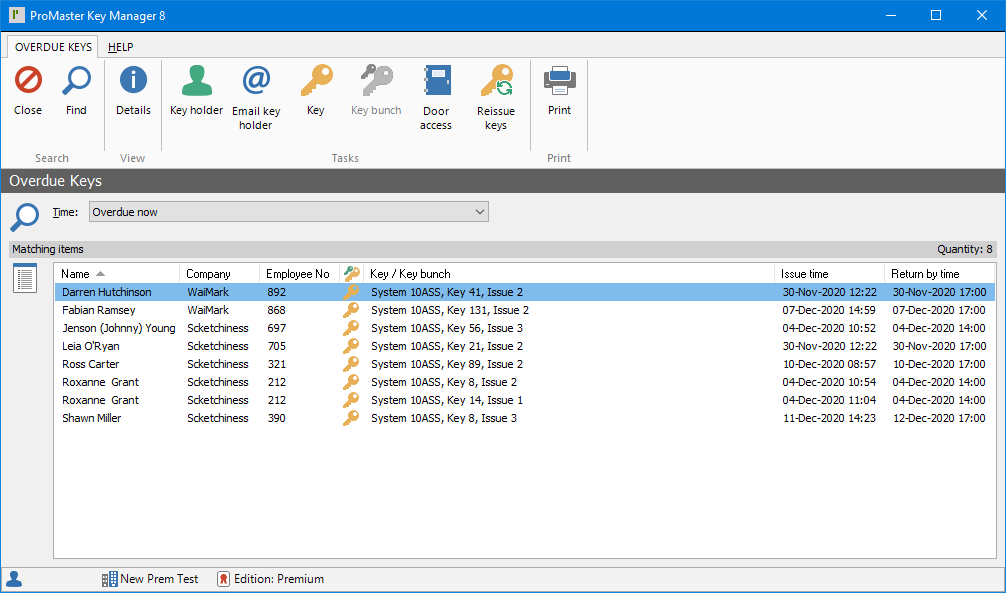
Follow up overdue keys

Quick check if any keys have not been returned on time and have all the information to contact the key holder on hand.

 ProMaster Key Manager 8 Overdue Keys view. The top of this view has a menu ribbon with 2 tabs, OVERDUE KEYS (which is active) and HELP. The ribbon is divided into 4 sections: “Search”, “View”, “Tasks” and “Print”. The “Search” section has a button to “Close” the view, and a “Find” button to refresh the results below. The “View” section contains a “Details” button to view more in-depth details of the currently selected item in the below list. The “Tasks” section contains buttons for viewing the “Key holder” details, “Email key holder”, view the “Key”, view the “Key bunch” (currently disabled) , view the key’s “Door access” and “Reissue keys”. The “Print” section contains a button to print the list of items displayed below. Below the menu ribbon is a drop-down list of predefined time periods to affect the list below. Lastly, there is a list of key issue records that fit into the time period selected from the above drop-down list, showing the key holder’s “Name”, “Company”, “Employee No”, and icon indicating if the item is for an individual key or a key bunch, a description of the “Key / Key bunch”, the “Issue time” and the “Return by time”.

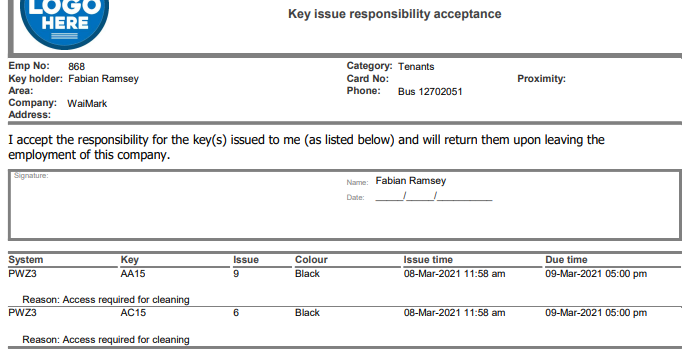
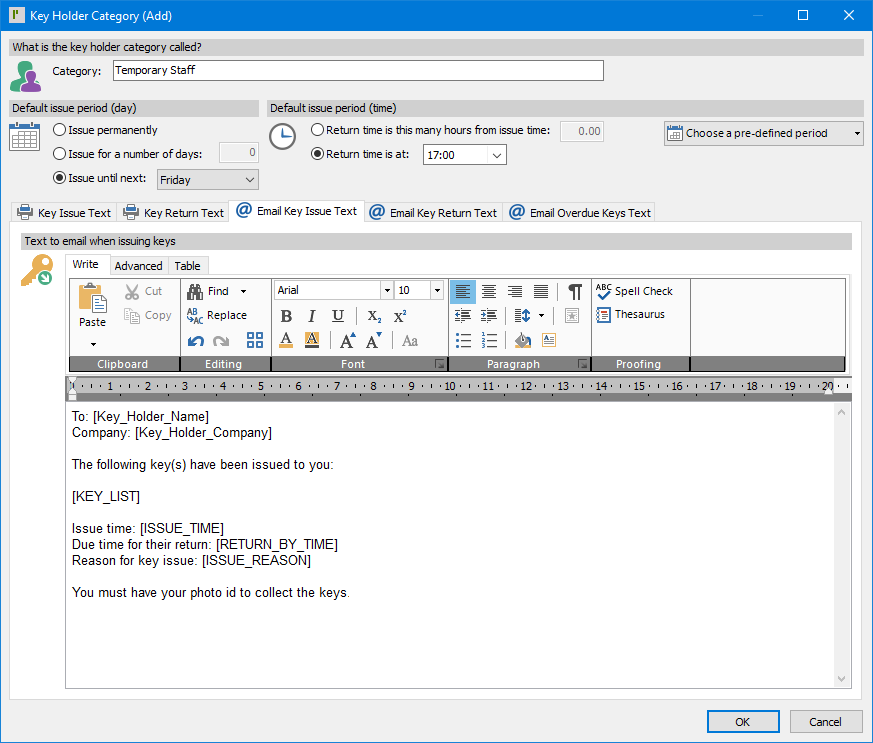
Categorise key holders

Give key holders different default settings and text for key issue acceptance forms, confirmation reports and emails depending on their role within your organisation.

ProMaster Key Manager 8 Key Holder Category (Add) window showing a new Key Holder Category being added. At the top of this window is a section to define what the “Category” is called. Below that is 2 sections that define the “Default issue period (day)” and “Default issue period (time)” when issuing keys to key holders that are assign to this key holder category, these are currently setting the default to 5pm next Friday. Below the default issue periods, are 5 tabs; “Key Issue Text”, “Key Return Text”, “Email Key Issue Text” (currently active), “Email Key Return Text”, and “Email Overdue Keys Text”. The active tab contains a rich text editor, with text, containing “merge fields” to be populated into an email addressed to a Key holder belonging to this category, when they are issued a key. In the bottom right corner, there is an “OK” button (for saving the Key holder category) and a “Cancel” button.

 ...Working with your locksmith

Update your systems

Import updates to your key system from your locksmith or lock manufacturing company email, or end-to-end encrypted over the internet using the ProMaster Publishing Service.
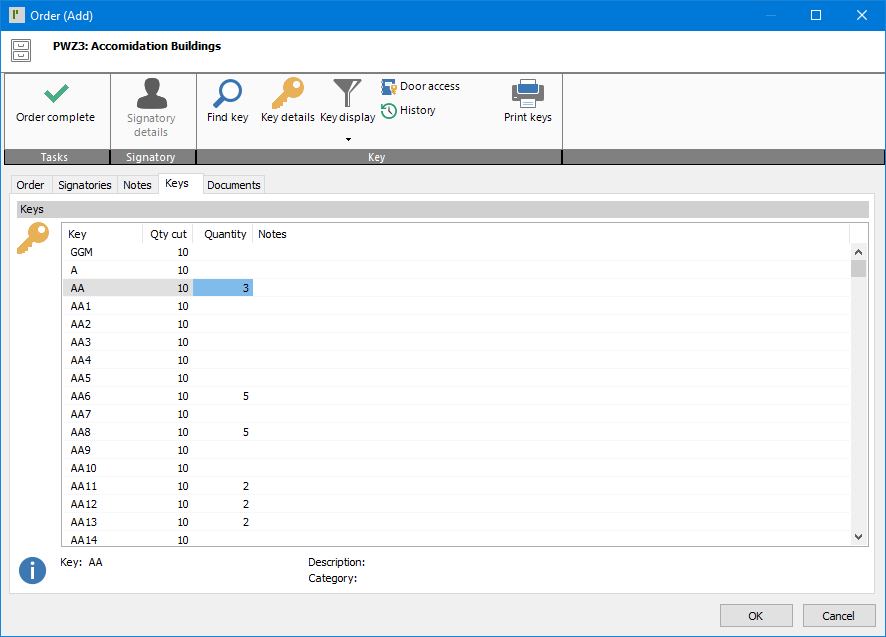
ProMaster Key Manager 8 Import Systems From Publishing Service window overlaying the main ProMaster Key Manager 8 window. The import window is showing a list of system updates that have been found on the publishing service, with checkboxes (all already checked) for selecting which system updates are to be downloaded and imported, the system number, and the name of the locksmith who has provided the update. Below the list is further information about the currently highlighted system update, displaying the system number, number of keys, doors, key issues and when the availability of the system update will expire. In the bottom right corner, there is a “Download and import” button for importing the selected system updates, and a “Cancel” button.

Order more keys

Create orders for additional keys in ProMaster Key Manager 8 and send the order to your locksmith via email.

ProMaster Key Manager 8 Order (Add) window showing a new order for additional keys to be created. At the top of the window, the System’s number, and description, that the order is for, is displayed. Next is a ribbon of buttons grouped into 3 sections, “Tasks”, “Signatory” and “Key”. The “Task” section contains 1 button to mark the “Order complete”. The “Signatory section contains 1 button to see “Signatory details” (currently disabled). The “Key” section contains options to “Find key”, view “Key details”, apply a “Key display” filter, view a key’s “Door access”, view a key’s “History” and “Print keys”. Under the ribbon are 5 tabs; “Order”, “Signatories”, “Notes”, “Keys” (currently active) and “Documents”. The “Keys” tab shows a list of all keys in the system that can be ordered. The list shows the “Key” number, “Qty cut” already for that key, and entry fields for the “Quantity” to be ordered and recording “Notes” against the ordering of the key. Below the list, information about the currently selected key is shown; “Key” number, key’s “Description” and key’s “Category”. In the bottom right corner, there is an “OK” button (for saving the key order) and a “Cancel” button.


 ...Standalone systems

Update your systems

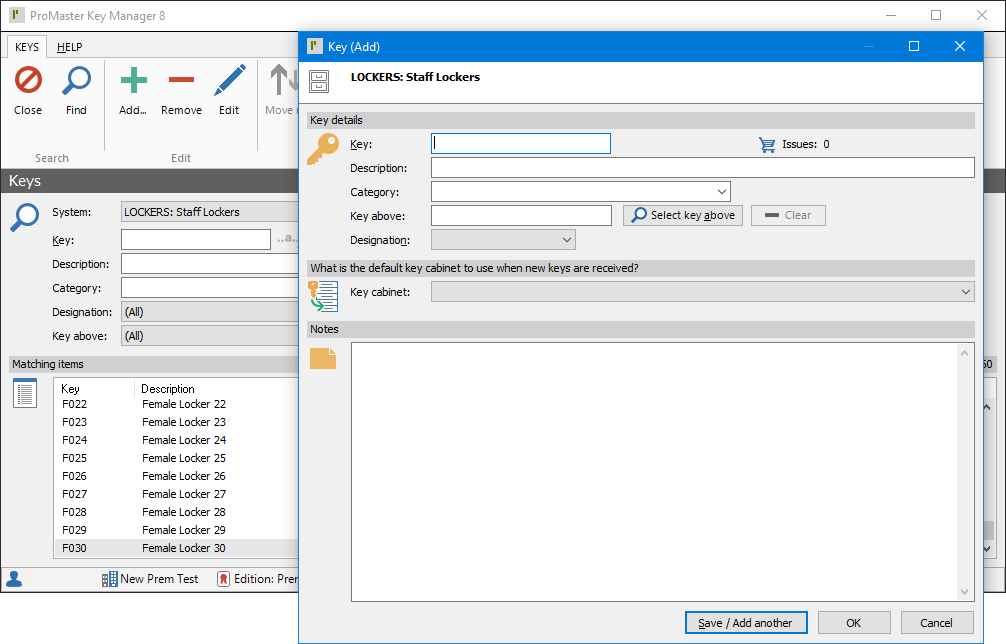
Use the intuitive interface to record changes to your systems one key or door at a time. Or make many changes by using the built-in bulk change functionality or importing CSV files.

ProMaster Key Manager 8 Key (Add) window, on top of the main ProMaster Key Manager 8 window showing the keys of a system. The Key (Add) window displays the system number and system description that the key is being added to. Below that is a section for recording the “Key details”. This section has fields for entering the “Key” number, “Description”, “Category”, displaying the “Key above”, which is set by clicking the “Select key above” button beside it or is removed by clicking the “Clear” button (currently disabled) beside that, and a dropdown list to set the “Designation”. The next section is “What is the default key cabinet to use when new keys are received?”. This contains a dropdown list to choose a “Key cabinet”. Next there is a “Notes” section with a large plain text field to type notes in. In the bottom right corner, there is a “Save / Add another” button (for saving the key and instantly opening another Key (add) window), an “OK” button (for the key) and a “Cancel” button.

Order more keys

Create orders reports for additional keys to be cut and confirm when the new keys have been received.


 ...Reporting

Print or email reports

  • Produce crisp clean professional looking reports with logical and consistent layouts. Reports have a wide range of options for selecting the information to include in the report and which data to display.
  • Keys - The keys in your systems with the option to show doors and/or key holders
  • Key hierarchy - The keys in your system presented in a tree style hierarchy
  • Doors - The doors in your systems with the option to show keys and/or key holders
  • Keying matrix - The keys and doors in your system presented as a matrix with many options for what to show
  • Key holders - The key holders that have been issued keys with the option to show doors
  • Key issue acceptance - Report with configurable text and listing the keys being issue for the key holder to sign
  • Key return confirmation - Report with configurable text and the keys being returned for the key holder to retain
  • Key cabinet - The keys that held your key cabinet(s)
  • Key quantity by status - The keys with the quantity of issues for each status
  • Overdue keys - Key holders and the keys that are overdue
  • Lost and broken keys - Keys that are lost and/or broken with options to show who and/or when
  • Compromised doors - Doors that are compromised by the loss of keys
  • Orders - Key orders with information about each order
  • Key order history - Keys with information about past orders
  • Key issue activity - List of key issues with information about key holder, issue time and status
  • Fees - List of fees with information about who, when and how much

Reports may be saved in PDF format and emailed. Email support for MAPI mail programs, Outlook, SMTP, Encrypted SMTP (e.g., Office365). Emails are sent in HTML, allowing full control over appearance. End user report writer available as a separately licensed feature in the Premium edition.
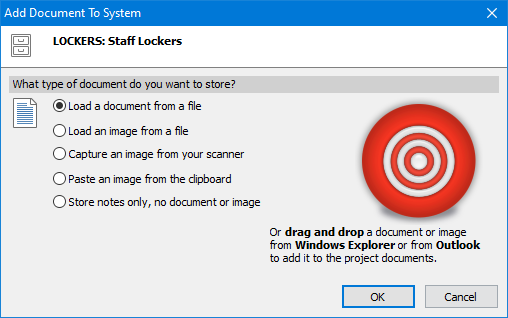
ProMaster Key Manager 8 Lost and Broken Keys Report options window on top of the main ProMaster Key Manager 8 window. The first report option section, “Which system do you want?”, contains a dropdown list to select the “System” and a “Select” button to search for a system. The second option section is “What date range do you want to include?” with a dropdown list for the “Date range” (currently set to “All”) and space around for additional option to be displayed, depending on what is set in the dropdown list. The last section is called “Options” and contains check boxes for enabling the options to “Show lost keys”, “Show broken keys”, Show key holder who lost each key”, “Show user who authorised each key” and “Show date that each key was lost or broken”. In the bottom left corner, there is a “Printer options” link, and in the bottom right, there are 4 buttons; “Print”, “Preview”, “Email” and “Cancel”.


 ...Document storage

Store all sorts of documents with your system and with your key holders including Outlook messages, Word and Excel documents and PDF documents. Import images or acquire directly from your scanner.
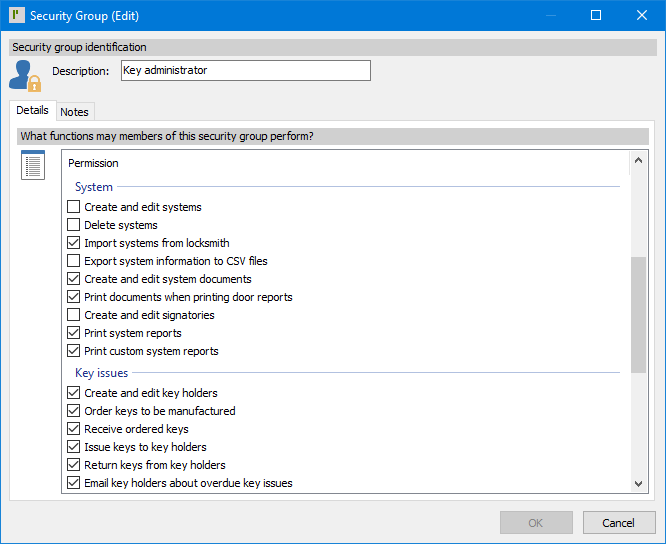
ProMaster Key Manager 8 Add Document To System window showing the system number and system description of the system that the document is going to recorded against. There are 5 radial button options to choose “What type of document you want to store?”. They are “Load a document from a file” (currently selected), “Load an image from a file”, “Capture an image from your scanner”, “Paste an image from your clipboard” and “Store notes only, no document or image”. On the right side is an image of a target with an additional option described below the target as “Or drag and drop a document or image from Windows Explorer or from Outlook to add it to the project documents”. In the bottom right corner, there is an “OK” button (for progressing with the chosen option) and a “Cancel” button.
ProMaster Key Manager 8 Image Editor window. At this top of this window is a ribbon menu with numerous tools for altering an image, grouped into 5 sections; “Clipboard”, “Editing”, “Select”, “Image” and “Zoom”. Below the ribbon menu the image being edited is shown (currently a building floor plan). In the bottom left corner, information about the image’s height, width and colour depth is shown. In the bottom right corner, there is an “OK” button (for saving the changes to the image being stored) and a “Cancel” button.


 ...Security

To ensure tight security, ProMaster Key Manager 8 has a wide range of security settings that your administrator may grant to each user (e.g., Data entry, issue keys, lose keys, etc.).

ProMaster Key Manager 8 Security Group (Edit) window. At the top of the window is a “Security group identification” section, here there is a field for entering a “Description”. Below that section are 2 tabs; “Details” (currently active) and “Notes”. On the “Details” tab is an extensive list of “What functions may members of this security group perform?”, with each function having a checkbox for enabling or disabling it. 15 functions are currently visible, but a scrollbar on the right indicates that this is less than ½ the available functions that can be enabled/disabled. In the bottom right corner, there is an “OK” button (currently disabled) and a “Cancel” button.